M: Jos tulen takaisin
The artist M (or Ämmä amongst friends) is adventurous enough to go along with my crazy ideas. Minja Koski originally asked if I wanted to be the cinematographer for the music video for Jos tulen takaisin. But as the shooting deadline approached and we didn’t have a clear plan I started to propose ideas that eventually took over. Basically I hijacked the song. I ended up writing a script a few days before we began shooting.

Color please!
In a way this project turned out to be quite ambitious. We had all the necessary crew members and we scouted the locations in advance with Minja and Miikka Ahlman who is the producer of M. A two day shoot which is quite unusual for me when it comes to music videos. Normally it’s just one day and a two person crew. Although the plan I had was quite loose the project itself was realised in a very organised manner schedule wise.
Hanna Kaitila had all the costumes planned out when she arrived. I had sent her an image with all the colors I had in my mind and based on that she created a variety of combinations Minja and Ida could wear. I’ve always had a problem making decisions on what colors to use. I end up using muted colours that often turn out quite bland on videos. Hanna had none of that and I really learned a lot from her on how to use colour effectively.
Lighting on the road
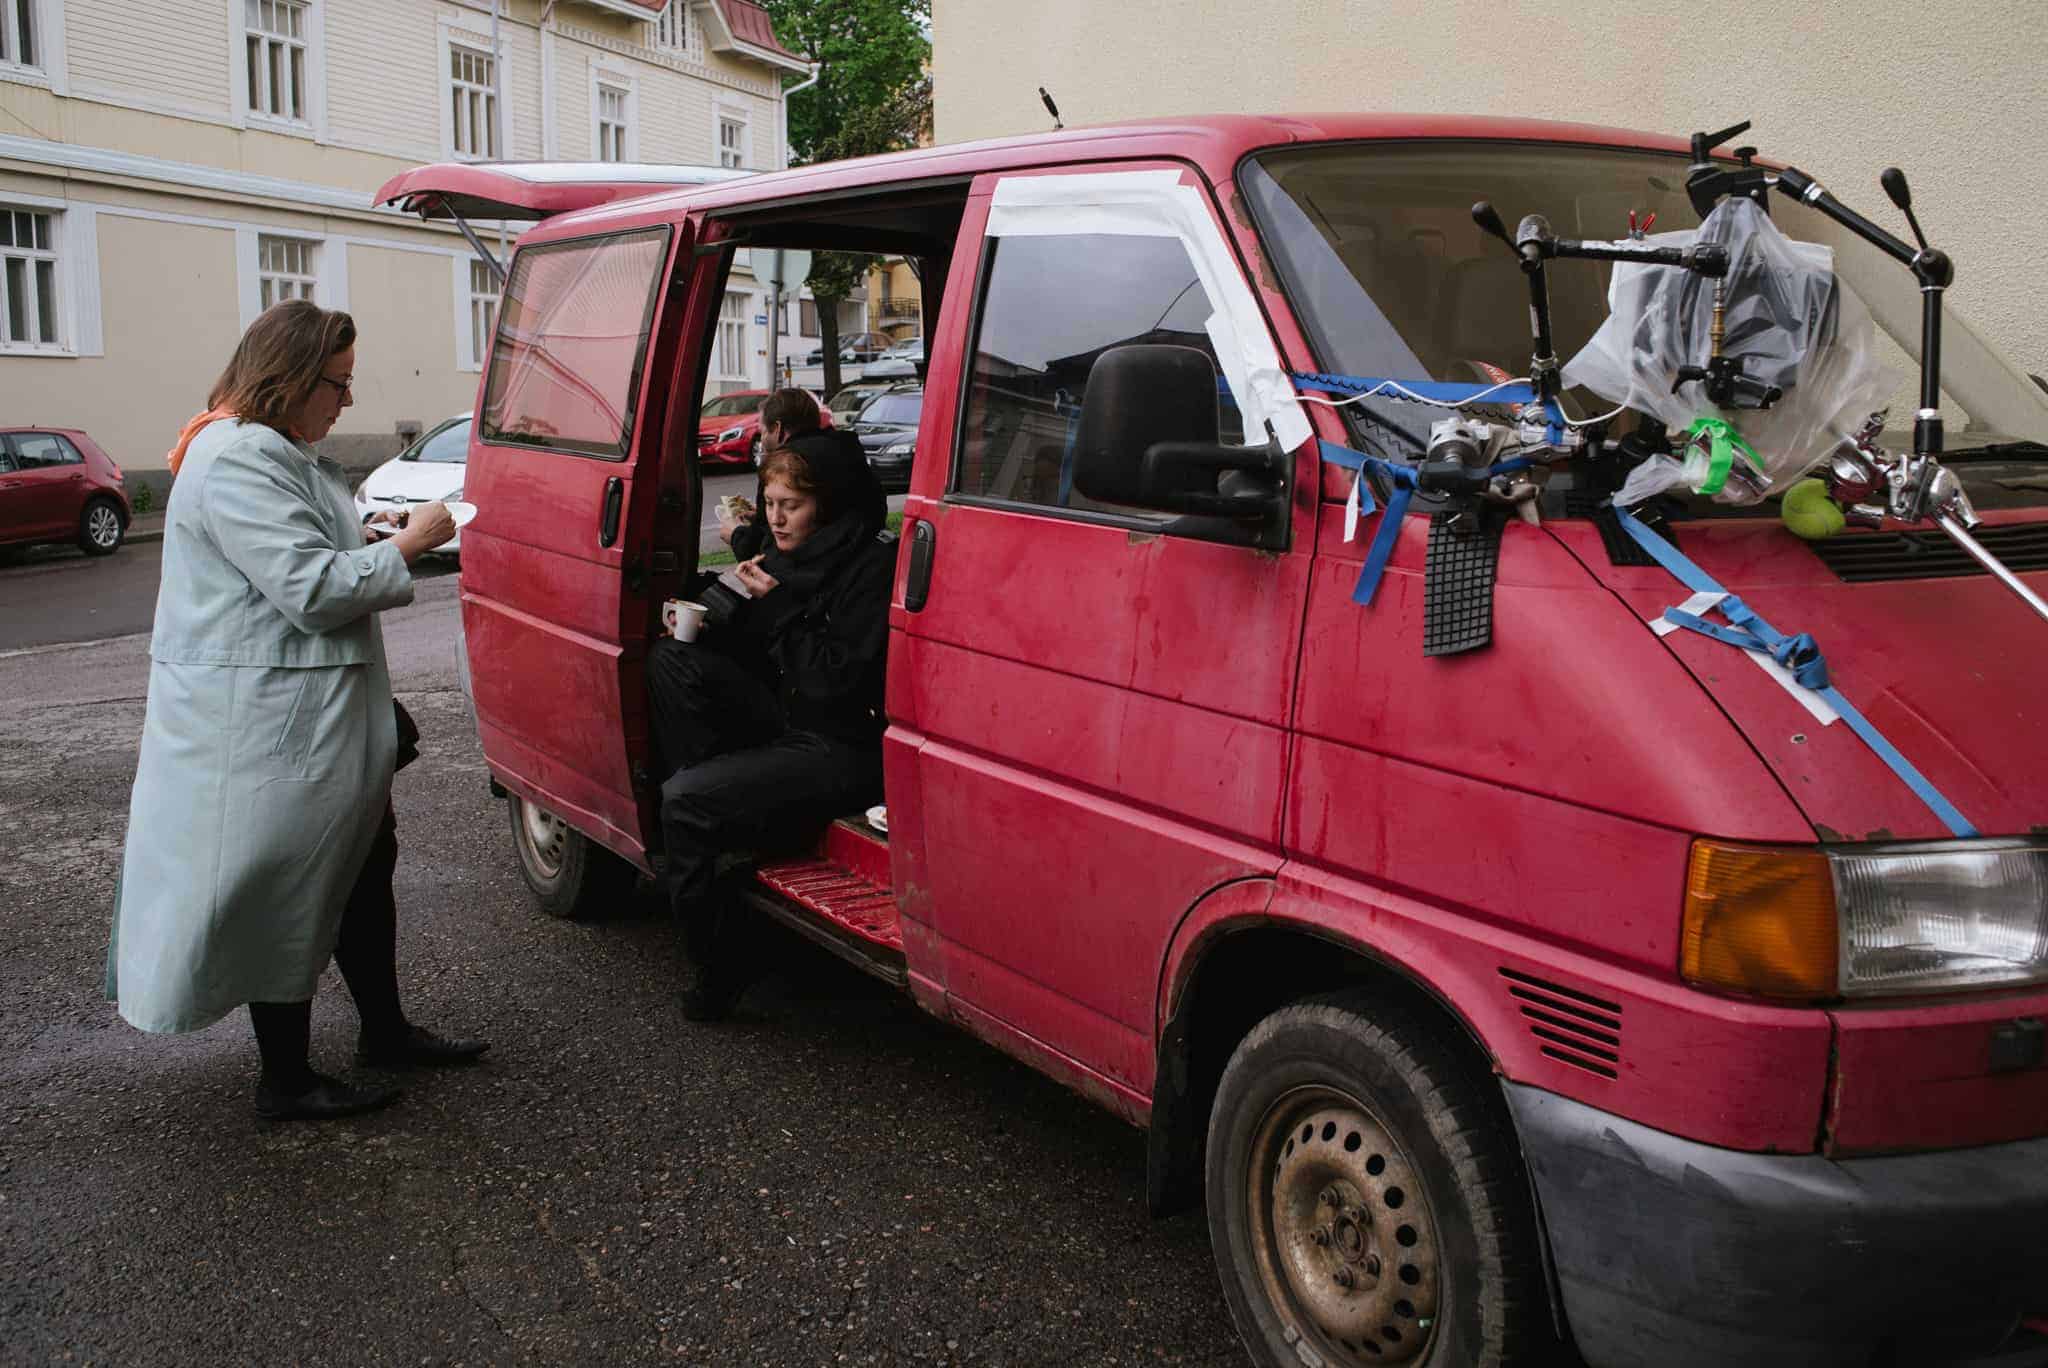
My trusty gaffer Anna-Mari Nousiainen was once again available to light the video. Because we were to shoot mostly inside a van while driving we needed a portable lighting set that ran on batteries. We rented a 40W Bi-Color Dedolight and a Led Velvet 2 that works with V-mount batteries. Two small Cineroid L10-BC LED’s were used inside the van. There was nothing to grip them to so we attached them with magnets to the metal body of the car. I originally bought the magnet hooks to hang a clothesline to my balcony. But just like all my clothes pegs they ended up on my lighting rig as well.
One Cineroid LED was placed to simulate light from the control panel and one as a backlight above and behind the driver. The same backlight was used as a backlight for the shots in the back of the van. The red light in the back of the van simulates the rear lights and was a battery operated Dedo light with a red gel on it. The Dedo light was also used in some shots as supplementary headlights. All in all very little light was used and I relied a lot on street lights and practicals available at the shooting locations.
Quite a few scenes were planned to happen during the golden hour and sunset but it rained for the most part of our shoot. All of those shots had to be reinvented.
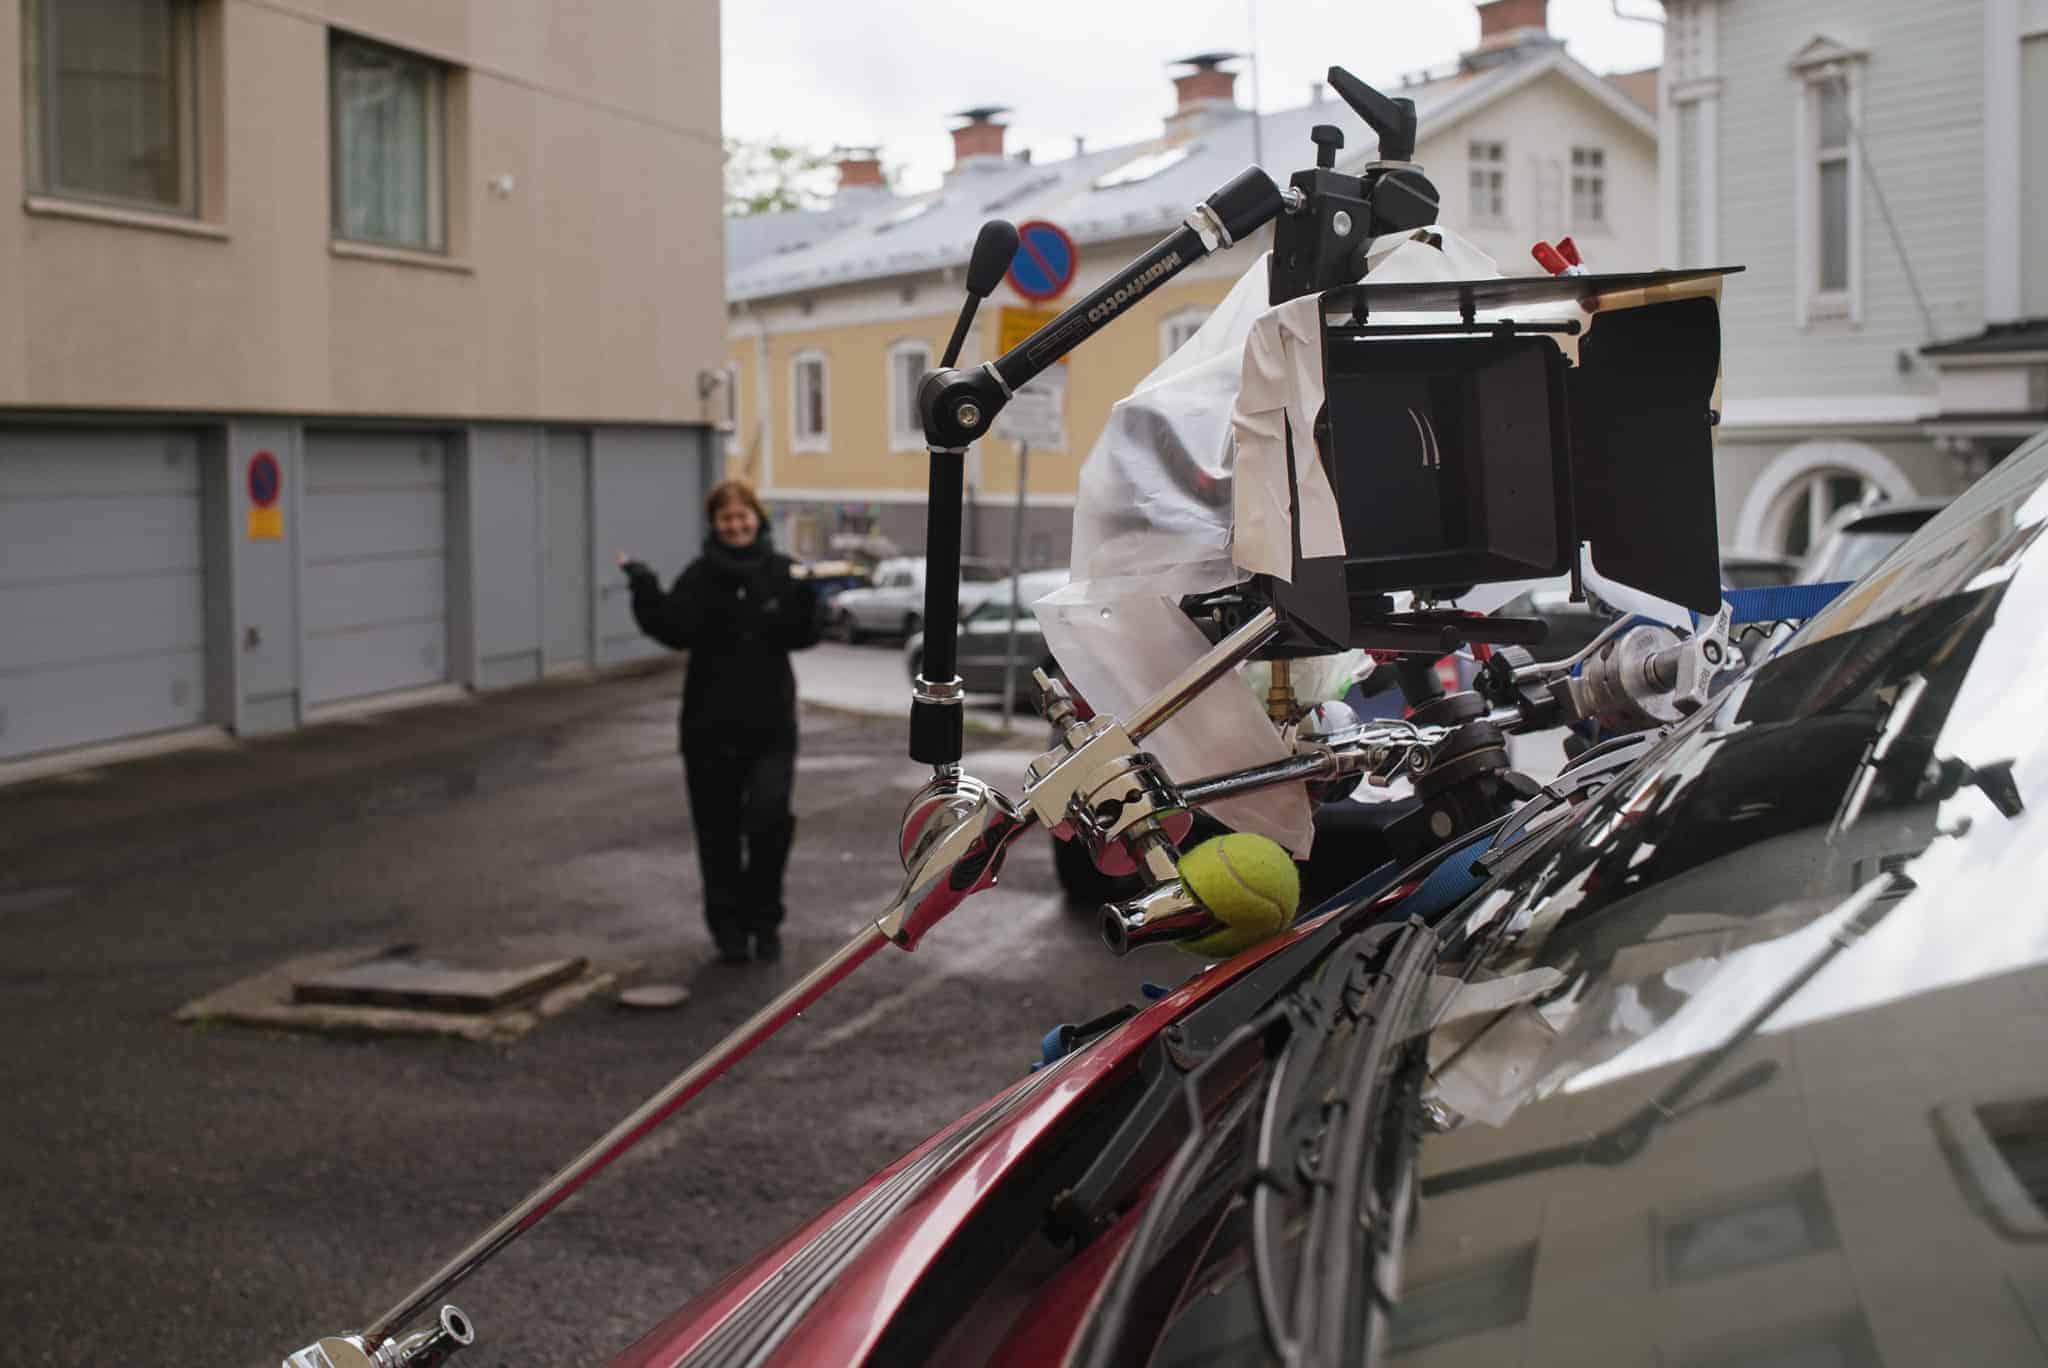
Rigging the camera to the van
There’s a shot in Gus Van Sant’s film Elephant with two people in a car pictured through the windshield. When the engine starts the camera visibly shakes and you realise the camera is bolted to the hood of the car. I thought this was genius. The camera shake made the energy of the engine starting really visceral. I’ve wanted to do this ever since I saw that shot. Rigging a camera to the car is not that easy though and needs a lot of specific grip equipment. My new Blackmagic Pocket 4K camera rig weighs less then five kilos which made things a lot easier.

A car rig needs to be done properly. I would’ve tried to do it myself if need be. Luckily Anna-Mari is smart and knows the limitations of what we can and can’t do. She made sure I’d push to get Teemu Rosenqvist to do the rigging. Luckily Teemu was available and we allocated two hours for the rigging which was exactly how long it took. It’s not difficult but it’s important it’s done safely. We managed to get great shots without destroying my brand new camera.
The Blackmagic Pocket 4K has a bluetooth connection that allowed me to control the camera with an iPhone app. You can read more about that in my Blackmagic Pocket 4K review.


Editing with Davinci Resolve
This was the first project I’ve edited with Davinci Resolve. Biggest reason was that I shot the video with the Blackmagic Pocket 4K camera in Blackmagic RAW format that is not supported by Premiere Pro yet. I’ve been using Premiere as my main NLE for seven years but I’ve been curious about Final Cut Pro X and Resolve. I even attended a two day Final Cut Pro X course some time ago but to be honest I didn’t find it worked for me. Something about it felt unintuitive and I didn’t get the workflow it promotes.
Editing with Resolve felt much faster compared to Premiere Pro. Just after a few hours of editing I was comfortable with it. You can set the keyboard shortcuts to match Premiere which helps a lot. All the settings that require at least 3-5 clicks in Premiere seemed to be accessible much more easily with Resolve. Stabilization, crop, zoom, effects are all visible at all times. It would be possible to set up Premiere Pro in much the same way. In Resolve However it’s very cleverly laid out and you don’t need to adjust things nearly as much as you do in Premiere. Resolves audio workspace is also much better in every way. The colour correction workspace is the only thing that is quite a bit more complicated compared to Premiere and takes a bit longer to understand. I am seriously considering it being my main NLE despite a few downsides.

Choppy chop laggy playback
Because of the 4K BRAW format Resolves playback got quite a bit choppy especially after I started adding colour correction. My iMac from late 2012 with 3,4 GHz Intel Core i7, 32GB RAM and only 2GB GPU really struggled with the footage. If I disabled all colour correction I was able to playback full speed in half resolution. Despite that I feel the BRAW footage is so flexible I will most likely be using it over Prores. A brand new computer with more power would solve the issue of course.
Not completely Resolved…
I had quite a big scare after seven days of working on the project. While editing I didn’t have a single crash. Resolve crashed on me just as I was about to render the final version of the video. Ok, I thought, no problems. With Premiere Pro I experience crashes all the time. When I restart it usually opens a recovery file and there’s even autosaved backup files to boot. At most I’ve ever lost ten minutes of work with Premiere. But this crash completely corrupted the project. It would not open what ever I tried.
I emailed the project file to Blackmagic support and they took a look but could not recover any data from it. Total loss! Forum posts about corrupt projects in Resolve made me realise that if it happens you’re not gonna be able to rescue the project. Although there is an autosave function in Resolve you need to manually turn it on for every single project! I went to bed thinking that I would have to rebuild the whole edit.
In the morning I woke up remembering that I have a Timemachine plugged into my iMac! I’ve had it for seven years and never had to use it before this. I browsed the Timemachine and there it was. Resolve project database that was saved an hour before the crash occured. Usually I save Premiere projects on my RAID drive along with the media files. Had I done that with Resolve I wouldn’t have been able to salvage the database from the Timemachine as it’s set to backup the system drive only. Lucky me! From now on I’ll be doing regular backups in Resolve and also make sure the autosave function is turned on for each project.
Credits and links
Director, cinematographer, editor: Sami Sänpäkkilä
Gaffer: Anna-Mari Nousiainen
Grip: Teemu Rosenqvist
VFX: Pasi Viitanen
Costumes: Hanna Kaitila
Runner: Miikka Ahlman
Actors: Minja Koski, Ida Sofia Fleming
Thank you: Valto Koivula Oy, Sami Karttunen
M – Näytän missä asun LP / digital (Solina Records)
Digital / Spotify
www.m-official.fi
www.facebook.com/Mtehtaantytto
www.instagram.com/mtehtaantytto